

Key Takeaways
Why frame material changes everything
Window frames are not interchangeable when it comes to maintenance. The material your frames are made from determines how they age, where they're vulnerable, and exactly what care they need to stay functional and draught-free. Applying timber-frame logic to uPVC, or ignoring the specific demands of aluminium in a coastal climate, can lead to problems that are far more expensive than the upkeep they replace.
Folding window maintenance into a regular home care routine is the most reliable way to catch small issues before they escalate. Our seasonal home maintenance guide can help you build that cadence. The frame-specific guidance below gives you the detail you need for each material.
Timber frames: protecting against moisture and rot
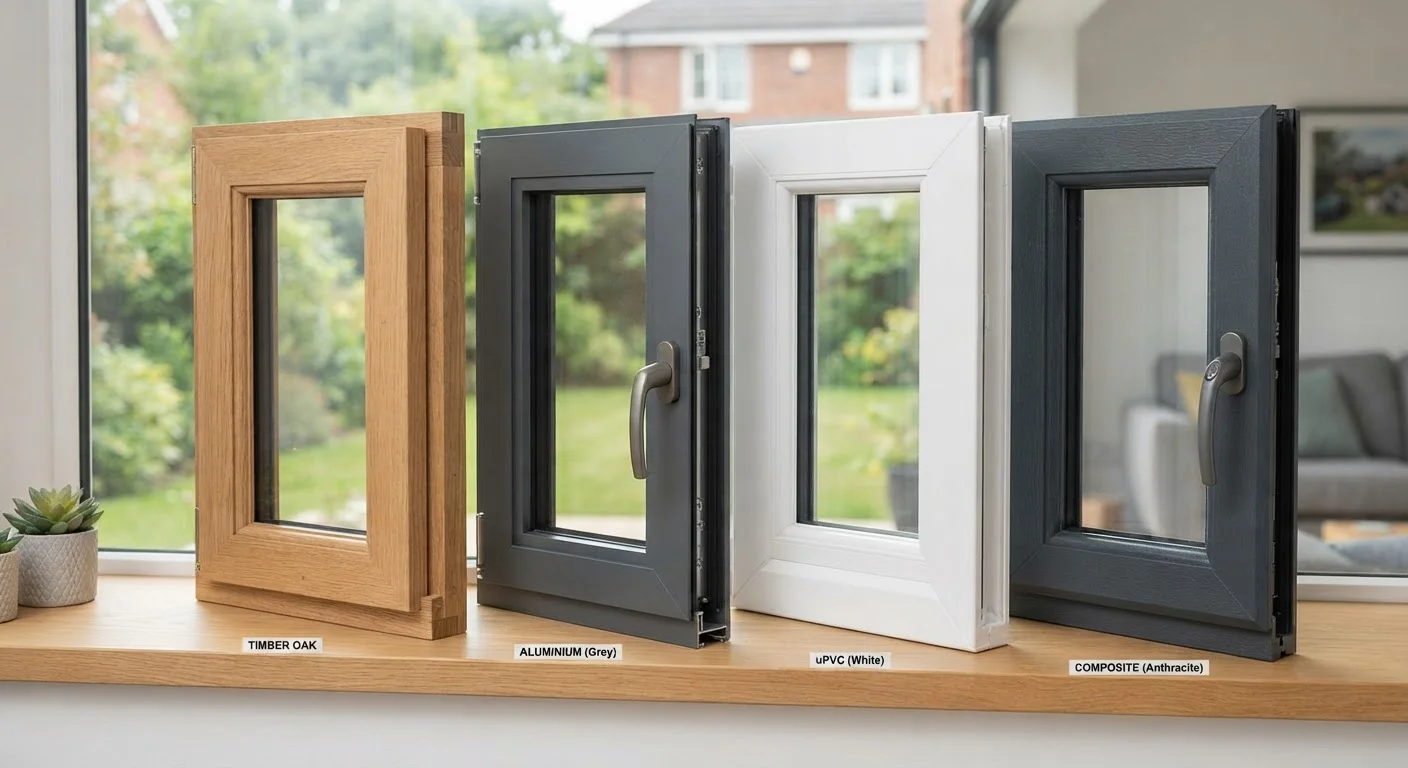
Wood is one of the oldest window frame materials and remains popular for its warmth and character — but it demands the most hands-on maintenance of any option. Moisture is the primary enemy. When paint or stain cracks and peels, bare wood absorbs water, swells, and eventually rots from the inside out.
Inspect timber frames every spring and fall. Look for flaking paint, soft spots (press with a screwdriver — rot feels spongy), gaps in the glazing putty, and cracked caulk at the frame-to-wall junction. Sand back any peeling areas to bare wood, prime, and repaint with an exterior-grade paint formulated for wood. Unpainted frames should be restained or re-oiled on a schedule the finish manufacturer recommends — typically every one to three years depending on sun and rain exposure.
Replace any deteriorated glazing putty around the glass pane itself, as this is a common entry point for water. Timber that runs along the sill — the horizontal bottom piece — collects the most water, so inspect it closely and ensure it still has a slight outward slope to drain rain away.
Soft spots in a timber sill are an early warning sign that rot has already begun inside.
Aluminium frames: corrosion control and hardware upkeep
Aluminium frames are prized for their strength, slim profiles, and low upkeep — but they are not entirely maintenance-free. In coastal or high-humidity areas, the protective oxide layer on aluminium can be overwhelmed, leading to pitting or white powdery oxidation called chalking.
Clean aluminium frames twice a year using a mild soap and water solution and a soft cloth. Avoid abrasive cleaners or steel wool, which scratch the anodised or powder-coated finish and accelerate corrosion. After cleaning, apply an automotive-grade wax or a product designed for aluminium to add a protective barrier, especially in salty-air environments.
Pay attention to hardware: hinges, handles, and locking mechanisms can seize or corrode on older aluminium windows. A silicone-based lubricant (not oil-based, which attracts dirt) applied to hinges and tracks a couple of times a year keeps them operating smoothly. Check that drainage holes — small slots at the bottom of the frame designed to expel water — are clear of debris and not blocked by paint or dirt.
Blocked drainage holes in aluminium frames are a surprisingly common cause of interior water damage.
uPVC frames: preserving seals and surface appearance
Unplasticised polyvinyl chloride — uPVC — has become one of the most common frame materials in US homes due to its affordability, thermal performance, and resistance to rot and corrosion. However, it does yellow or become brittle with prolonged UV exposure over many years, and its energy efficiency depends heavily on the integrity of its rubber gaskets and sealed units.
Clean uPVC frames with warm soapy water and a non-abrasive cloth. Avoid solvent-based cleaners, bleach, or harsh chemicals, which degrade the plastic surface and cause discoloration. A specialist uPVC cleaner can restore minor yellowing, though heavily yellowed frames are difficult to reverse.
The rubber gaskets running around the glass and along the sash edges are critical to energy performance. Inspect them annually for cracking, hardening, or gaps. A light application of a rubber conditioner or silicone spray keeps gaskets supple. If a gasket is torn or no longer seated correctly, replacement strips are widely available and can usually be pressed in by hand. Check that the multipoint locking mechanism — the system of hooks and rollers along the edge of the sash — is properly adjusted so the sash closes firmly against the frame seal.
A uPVC sash that doesn't close firmly against its seal undermines the frame's energy-saving advantages.
Composite frames: caring for a multi-material system
Composite window frames typically combine a timber core with an exterior cladding of aluminium or uPVC. This hybrid design aims to give you the thermal performance and interior warmth of wood with the weather resistance of metal or plastic on the outside. Maintenance follows that dual nature.
The exterior cladding generally needs only the care appropriate to its material — see the aluminium or uPVC guidance above. The interior timber side, if left exposed or finished with paint or stain, needs the same moisture vigilance as a solid timber frame: check for peeling finish, soft spots, and gaps in caulk or glazing compound.
Pay particular attention to the joints and corners where the cladding meets the timber core. Water that infiltrates these joints can reach the wood without being visible on the surface. Probe corners gently and check that any sealant between the cladding and frame is continuous and sound. If you see water staining on interior trim near the frame, investigate promptly — composite frames can conceal rot inside the core for some time before it becomes obvious.
Interior staining near composite frames often signals water has reached the timber core inside the cladding.
Universal upkeep: what every frame material needs
Regardless of material, several maintenance habits apply to every window in your home. First, inspect and renew weatherstripping and exterior caulk annually. These seals are your first defence against drafts, water infiltration, and energy loss — and they degrade on every frame type. For guidance on which sealing method suits which gap, see our guide to caulking vs. weatherstripping.
Second, clean the glass tracks or channels where the sash slides. Dirt and debris cause wear, make windows harder to open, and can damage weatherstripping. A vacuum followed by a damp cloth is usually sufficient.
Third, check that every window still opens, closes, locks, and latches correctly. A window that won't close fully or lock securely is both an energy and security problem. Hardware adjustments — tightening screws, realigning strike plates — are generally straightforward DIY tasks. For jobs that feel beyond a simple adjustment, understanding where the DIY boundary lies can help you decide when to call a professional.
Worn caulk and failed weatherstripping cost more in energy bills than the five minutes it takes to replace them.
Keeping on top of it all
Window maintenance is rarely complicated — it's mostly a matter of knowing what to look for and doing it on a consistent schedule. Each frame material has its own vulnerabilities, but all windows share the same basic requirements: clean tracks, intact seals, functioning hardware, and no pathway for water to enter the wall cavity behind them.
When condensation appears between panes
Fogging or condensation inside double- or triple-glazed units means the sealed unit has failed — this is not a frame maintenance issue, but a glass unit replacement. No amount of cleaning or sealing the frame exterior will resolve it. Contact a glazier to assess whether the sealed unit can be replaced without replacing the entire frame, which is often the more economical option.
If you spot significant rot in timber, cracked frames, failed sealed units, or hardware that can't be adjusted back into alignment, those are situations worth escalating to a qualified window professional rather than attempting a patch fix. A well-maintained window should last decades — and the few hours a year spent checking on them is a straightforward investment in your home's comfort and value.